11 November 2008

what the heck is 'orzo'?

so at work, i've become known as "the one who cooks a lot." people have a habit, as it gets closer to the end of the day, of asking me what i'm going to cook for dinner. sometimes i have something planned out (you know, the hour of work time i wasted searching for a new recipe), and sometimes i really have no idea. this particular day, i had planned to make ina garten's roasted vegetable orzo for dinner. question time came, and i gave my response. and no joke, 8 out of 10 people said in response, "what the heck is orzo?" i guess sometimes i forget that most people aren't as food-curious as i am. and some people eat their meat and potatoes, and thats the end of their culinary adventures. i had always thought of orzo as normal. i guess its not.

for those of you who are at the very beginning of your culinary adventures, orzo is rice-shaped pasta. put an emphasis on the shaped, as it's not made out of rice. at all. its made out of a type of semolina, actually. its most often used in soups, but can be used in many other dishes as well.

anywho, ina garten's recipe was delicious. you can use whatever roasted vegetables you like in this, although her suggestions are great too. i added zucchini to mine. the lemon-olive oil dressing was very good, too. i left out the feta cheese and pine nuts as well. i didn't really mean to leave the pine nuts out, i just forgot to pick them up at the store. and the cheese...well...we all know i don't like cheese.


comfort food.

ahhh comfort food. you know, the stuff your parents have been making for you since you could eat solid food. once you leave the nest, its the stuff you always want when you've had a bad day, or its cold outside and you just want to be cozy. usually, comfort food involves a fairly simple dish. a stew, a casserole, some kind of pasta. this is one of my favorites. it's been one of my favorite dishes since i was very little.

mommy's tuna casserole

2 cans cream of mushroom soup
1 lb of pasta
2 cans of tuna
fried onions

all you've got to do is cook the pasta until its al dente, mix the pasta, tuna and mushroom soup together, put in a rectangular baking dish, sprinkle the fried onions on top, and bake at 350 for about 20-30 minutes. best when served with salad and garlic bread. but good by itself too. :)

09 November 2008

Namesake Dishes, Part 2: Stuffed Bell Peppers


So this one's been a recurring favorite in our kitchen these days. Why? because it's absolutely delicious despite its ease in the kitchen. Some more added perks include the flexibility of ingredients, laughably easy cleanup, and the fact that's it's a pretty healthy dish.


Stuffed Bell Peppers

4 bell peppers (yellow and orange are our favorites), with tops/seeds removed.
1 lb ground beef
1 onion
1 15 oz can black beans
1 15 oz can diced tomatoes
salt
pepper
2 cloves garlic
red & brown rice

-Preheat oven to 350 degrees.
- Chop off the top of the bell peppers and de-seed them thoroughly.
- Chop the onion and garlic and set those aside.
- Brown the ground beef in a pan.
- To the browned beef add salt, pepper, garlic, and onion. Cook until the onions get a little softer. You can add any other seasonings you'd like here. Get creative!
- Add black beans and tomatoes.
- Let mixture cook for 5-8 minutes more.
- Place bell peppers open side up on a foil-lined cookie sheet.
- Fill peppers with beef mixture and bake for about 25 minutes.
- Serve with cheese on top (optional) and rice.

As you can see, we love to use lots of great colors in this dish, namely the yellow and orange peppers. They offer a good combination of the sweetness of red and the resonant flavor of the green. On top of that the flexibility in seasonings add tons of dimensions to the remake value of the dish.


(edit: another thing nice about this dish is it gives us a perfect excuse to go in the backyard and get all artsy...)


oh pumpkin...

i can't stop cooking with pumpkin. sadly, i've not gotten to use fresh pumpkin all season. in fact, i didn't even get to carve one for halloween. sad. 

brandon had a potluck last weekend. and well, a broken hand isn't the easiest thing to cook with. so he half-asked and i half-volunteered myself to make something. something for dessert. 

a recipe for pumpkin spice cupcakes (yes, cupcakes, not muffins) was brought to my attention a few days earlier, and i decided this was the perfect opportunity to try it. i had also never made cream cheese frosting before, so why not learn something new?

the recipe was from martha stewart, but i found it on tammi's food blog, running with tweezers.
 
Pumpkin Cupcakes
  • 2 cups all-purpose flour
  • 1 tsp baking soda
  • 1 tsp baking powder
  • 1 tsp coarse salt
  • 1 tsp ground cinnamon
  • 1 tsp ground ginger
  • 1/4 tsp fresh nutmeg
  • 1/4 tsp allspice
  • 1 cup brown sugar
  • 1 cup granulated sugar
  • 2 sticks unsalted butter, melted then cooled
  • 4 large eggs
  • 1 can (15 oz) pumpkin puree
  1. preheat oven to 350. line cupcake pans with paper/foil liners. in a medium bowl, whisk together flour, baking soda, baking powder, salt, cinnamon, ginger, nutmeg and allspice.
  2. in a large bowl, whisk together brown sugar, granulated sugar, butter and eggs. add dry ingredients and whisk until smooth. whisk in pumpkin puree.
  3. divide batter among liners, filling each about half full. bake until tops spring back when touched and a toothpick inserted in the center comes out clean; about 20-25 minutes. 
once the cupcakes have cooled completely, frost! i found a generic cream cheese frosting recipe and used that. a piece of advice for you: use half the amount of sugar in your cream cheese frosting. its quite fantastic and not as sickeningly sweet as it is with the full amount.

they came out beautifully, and were incredibly delicious. apparently they got devoured at the potluck. and the roomies got the ones that didn't make it to the potluck, and those were gone within a day too. i plan to make them again for thanksgiving, i think.

cupcakes under romantic lighting <3


up close and personal


we have returned...

you may have noticed we've been on a slight hiatus. long story short, brandon broke his hand. therefore, there's been little motivation to update. that and because after cooking and washing dishes, i get lazy and don't want to do anything remotely involving work.

anyway, there are several recipes to post. lets begin, shall we...

okay, so...lets just get this out there. i don't like cheese. i really don't. i used to. but now it just makes me kinda nauseous. brandon really likes cheese. so i feel bad once in a while because i never cook with cheese. parmesan chicken was my attempt to incorporate a bit of cheese into the cooking, because i was feeling particularly nice. it's like he knew i was going to cook with cheese. he came home with flowers for me. :)

the recipe is very easy, even for someone who has never breaded anything before (me). all you need is some chicken (duh), an egg, a little water, parmesan cheese, some flour and some breadcrumbs (i used italian style panko breadcrumbs...they were fantastic).

Preparation:
  1. beat 1 egg with a tablespoon or so of water. you're going to have to put the chicken in it, so find a container/bowl/plate that will work for that.
  2. mix 3/4 cup breadcrumbs and 1/4 cup freshly grated parmesan and spread out on a plate
  3. mix 1/2 cup flour with some salt and pepper and spread out on a plate.
  4. cut chicken into whatever size pieces you'd like. you can do the entire breast, strips, nuggets...pretty much whatever you want.
Coat each piece of chicken in flour, then in the egg mixture, and then in the breadcrumbs mixture. Once you've done this to each piece of chicken, heat up a tablespoon or two of olive oil and a tablespoon of butter in a pan until the butter melts and the olive oil is hot. place the chicken in the pan, and cook for a few minutes on each side. the smaller the pieces, the shorter the cooking time. make sure you watch your chicken though, you don't want to burn the breadcrumbs.

this dish goes really well with almost any kind of vegetable. i've made it with sauteed spinach, salad, etc. i decided to try roasted asparagus this time. heat oven to 350, drizzle olive oil over asparagus, season with a bit of salt and pepper, and cook for about 20-25 minutes. you can vary your cooking time depending on the texture you prefer.


09 October 2008

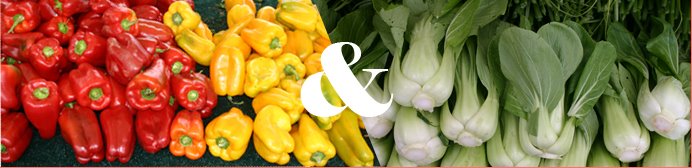
Namesake Dishes, Part 1: Bok Choy & Friends


Ahhh, the serene calm of the kitchenscape. This is the kind of thing I signed up for: a true sense of freedom and release, the calm strength of creating something from the barest of raw materials. Like a freshly harvested box of corn starch, or a plastic tub of tofu, fresh off the vine. Er......


There, that's more like it.

Anyway, on the menu a few nights ago was a big question mark. Mel had been putting a lot of effort in the kitchen (and into this blog) for the past couple of days, so it was my turn to step up to the plate. I felt like a serious foodie that day. Since I had class and work all day, I spent all my free time thinking up a recipe for later that night. In the end I came up with this:

Bok Choy & Friends Stir-Fry

You'll need:
2 medium-sized heads of bok choy
1 head of napa cabbage
1 brown onion (chopped)
1 brick o'tofu (14 oz or so) (cut into cubic inch pieces)
4 sprigs of green onion (chopped)
3 cloves of garlic (roughly chopped/minced)
3 tbsp soy sauce
3 tbsp oyster sauce
2 tbsp kecap manis (sweet soy)
2 tsp cornstarch
1/3 c. water
1 tbsp vegetable oil

(Disclaimer: these amounts were experimental, so don't be afraid to make little changes!)

-First off, combine the soy, sweet soy, oyster sauce, and the chopped garlic and green onions into a medium sized bowl. Stir them around a bit. Add the tofu to the bowl, then stir around again, making sure the get each piece of the tofu a turn in the sauce bath.

-Don't forget to start cooking the rice! For this dish I like to use brown rice because it soaks up the flavors from the sauce pretty well.

-At this point, I'd advise you to chop everything else. That way, you don't have to worry about how fast you'll have to go and you give the tofu a chance to have a first class soak.

-Chop the bok choy perpendicular to the grain of the stalk. I like to keep the pieces to about 1 inch in width. Separate the leafy bits from the stalky bits. I used only the leafy bits from the napa cabbage, and put them together with the bok choy leaves.

-Heat the vegetable oil in a deep skillet over medium to medium-high heat. Make sure the pan is hot, but not smoking.

-Toss the onions in for a little while to get them started, then after about a minute or two, put in the bok choy stalks. Toss them a little to spread the oil, but then don't touch them again for about 2 minutes.

-While waiting for the bok choy, mix the cornstarch and water in a separate cup.

-Add the leafy bits to the skillet and stir-fry for 1 minute or until you notice the leaves start to wilt.

-Add the tofu/sauce mixture and the water/cornstarch mixture and continue to stir-fry. (Some recipes call for some butter here, to add richness. Mine tasted good both with and without it, but if you do decide to add some, I'd say you don't need much more than 1/2 tbsp)

-Stir-fry for 2-4 minutes more, or until leafy bits are adequately wilted.


In the end, our tummies full of goodness and home cooking, we decided to try and cook more with kecap manis (a sweet soy sauce that is used a lot in traditional Indonesian cooking). The flavor of it adds a certain kick to dishes and is the only sweet thing I know that exclusively tastes good with savory foods. For now, though, our venture into the world of stir-fry left us very satisfied.

--BG--
mmmmmchicken...


when jillian (aka the bff) was living here over the summer, she used to make chicken piccata alot. and i'd always take part in the eating. because it was something i had never really had before. and because it also taught me to like capers. oh those cute little pickled flower buds. yum. anyway, since jilly left at the end of august, i haven't had any chicken piccata, and therefore was feeling deprived. so i decided to make some. i just kind of did it from memory, after watching jilly make it several times.

mix some flour with a little salt and pepper, and dredge your chicken. i find its best to use thin-cut boneless chicken breasts. they cook significantly faster.


melt a tablespoon of butter or two in a hot pan with a little olive oil. once it's hot, add your chicken, and cook it for a few minutes on each side. it should turn a nice golden brownish color. once that's done, set it aside on a plate. 


add about 3/4 cup white wine (i've heard chicken stock is a good alternative if you're not a fan of cooking with wine), a couple of spoonfuls of capers, and about 1/3 of a cup of lemon juice. make sure you scrape all the browned bits off the bottom of the pan as well. add the chicken back to the pan, and cook for 5 more minutes or so.


i think the dish goes great with pasta, although i'm sure it would be great with a side of roasted veggies or rice or pretty much anything else too.


i have to say, i think it turned out pretty darn good for a first try. although jillian's is definitely better. but maybe thats because i didn't have to cook it myself.... :)